Big Problem Solve school lol by RumelaRumi see p3

393507 thumbnail
Posted: 15 years ago
#1
Hi friends

Now since the new layout of IF is in place, I am sure some of the members are having problems in understanding how to upload their Avatars/Signatures.

So I am posting the procedure for all your help😊


- - - - - - - - - - - - - - - - - - - - - - - - - - - - - - - - - - - - - - - - - -


To Upload Avatar

1. Click Settings-which is right beside your Private Messenger Option
| Settings|
2. Press on Prefrence Tab. Scroll down, and you will find Avatar link
Put the link of your avatar in the avatar link box
3. Then, press on Submit and your avatar will be uploaded.
- - - - - - - - - - - - - - - - - - - - - - - - - - - - - - - - - - - - - - -


To Upload a Signature


Click Settings-which is right beside your Private Messenger Option
| Settings |
1. Click on Signature tab, put the link of your signature in the box and also choose YES for Always attach my signature to posts
2. Then click on Basic tab. Make sure that you have entered the correct email address in the Email address and confirm email boxes

3. Above the Email Address box, something like this is written -

Your email yet has not been validated.Please check your email and validate your account.You can not post any comment,upload video etc. without validataing your email.If you haven't received activation email then Click Here
Press Click here. An immediate email will be sent to your email address.
Check your Emails. You will get the following email
Welcome to India-Forums.com.

To activate your account and verify your e-mail address, please click on the following link:

The link will be provided here (Your activation link)
4. Press the provided link, a new window will open which says
Your Account has been validated
5. Next, post a new reply in IF. You will now be able to see your Signature.
- - - - - - - - - - - - - - - - - - - - - - - - - - - - - - - - - - - - - - -
Things to Remember
Sitewide Static Avatar:
    Width : 120px
  • Height: 120px
Animated Avatars:
    Width : 100px Height: 100px (Min) and 250px (Max)
  • Size: 300kb (Should not be more then 300kb)
Forum Banner Contests:
    Width: 925px (Fixed)
  • Height: 90px (Fixed)
Signatures Space (Total):
    Width : 500px (Maximum) Height: 300px (Maximum)
  • You can place a maximum of 2 signature images and 3 links.

- - - - - - - - - - - - - - - - - - - - - - - - - - - - - - - - - - - - - - -

I tried to explain as detailed as possible.
Hope you all will be able to follow the procedures properly😳
If still any members are still facing any problems or finding it difficult to understand the procedures then please post it in this thread itself. I will try to solve your queries.😊
Edited by rumela711926 - 15 years ago

Created

Last reply

Replies

32

Views

2.2k

Users

7

Likes

36

Frequent Posters

393507 thumbnail
Posted: 15 years ago
#2

Add titles and credits

You can use the same techniques that movies and TV shows do to begin and end their films. By using the title and credits feature in Windows Movie Maker, you can easily create an interesting title sequence at the beginning of your movie and provide a list of credits at the end. You can also place titles in between scenes of the movie.

Opening titles introduce your movie to your audience and provide background information about what they're about to watch. For example, a good opening title might be, "Little Star Production" or " A Film By Nausheenfan" You can show a title on a blank background or over your first clip.

Credits at the end of your movie provide a more satisfying ending while telling the viewer who was in the movie. This is also a great place to thank the people who helped you make the movie. You can show credits on a blank background or over your last clip. In Movie Maker, credits are considered a special type of title that can comprise many lines.

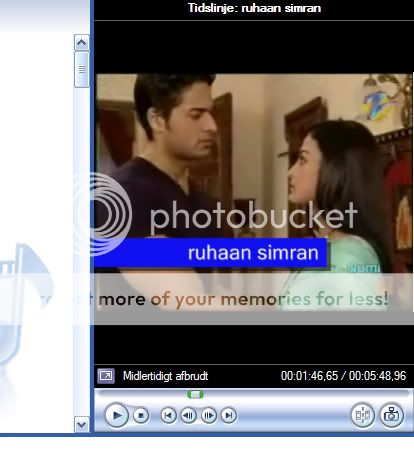
You can also use titles throughout your movie to introduce scenes or describe what is happening on screen. For example, "Ruhaan hugging Simran". Or you can use titles to introduce people. For example, the first time each of your family members appears on screen, you might display a title over the video that shows their name.


To add a title screen before your movie

1.

, and add clips from your collection to your storyboard.

2.

If you want to add a title before, after, or on top of a clip, click the clip on the storyboard or timeline.

3.

In the Movie Tasks pane, under Edit Movie, click Make titles or credits.

Movie Tasks pane with Make titles or credits selected

4.

Choose the type of title you want to add.

Movie Maker Where do you want to add a title page with Add title on the selected clip selected

5.

Click Change the title animation. Notice that you can choose between one-line titles, two-line titles, and credits, which can be many lines. You can use credits any time you need to display more than two lines of text, not just at the end of your video.

Movie Maker Enter Text For Title page with Change the title animation selected

6.

On the Choose the Title Animation page, browse through the different animations and watch them in the Preview Monitor to get an idea of what they'll look like. When you find the animation you want to use, click Change the text font and color.

Movie Maker Choose the Title Animation page with Change the text font and color selected

7.

On the Select Title Font and Color page, choose the color and font you want to use. If you're adding the title over a clip, use a dark font color for bright scenes and a light font color for dark scenes. Then click Edit the title text.

Movie Maker Select Title Font and Color page with Edit the title text selected

8.

On the Enter Text for Title page, enter your text. Then click Done to add the title to your movie.

Movie Maker Enter Text for Title page with Done selected

9.

If prompted to switch to the timeline view, click OK.

Movie Maker dialog box with OK selected

10.

In the Preview Monitor, click the Play button to see how your title will look in your video.

11.

If you want to change your title (for example, to cha

nge the color of the text to make it more readable), right-click the title on the Title Overlay row of the timeline, and then click Edit Title on the shortcut menu.

Title shortcut menu with Edit Title selected

Remember, you can add titles any time you want the viewer to know what you're showing or who someone on the screen is.

now here comes the example .. of making videomix!

hope it helped u guys a little bit..

and 2nd..

hete is a link provided by microsoft.com

http://www.microsoft.com/windowsxp/using/moviemaker/create/d efault.mspx


Edited by rumela711926 - 15 years ago
393507 thumbnail
Posted: 15 years ago
#3
How Can I use some sort of free software to able me Create a Video using photos and playing an mp3 over it, But I would like to add effects to the photos, I don't want a power point slide show. Could somebody please give me some advice or link to the software that enables me to create a short video with special effects.
A:
You can do this in Windows Movie Maker.

You will need a cheap Mic,and Wecam or video Recorder.

In WMM you can click the button that says: "Capture From Video Device" and you're webcam will come on automatically.

And it will show in real time on screen as you record you're self.

Then remember to click on the Mic icon on the same page that says:"Narrate Timeline" and it will record you're Singing or talking voice.

You could always record you're self on you're Webcam,..than save it to you're PC Import it to WMM then edit and upload it to YuoTube,..this way you can put some beginning and end titles on it if you want to.

Here's how you upload it to the Web:

To Upload to YouTube it needs to be in WMV.

Finish editing Movie in "Windows Media Maker"/"Realplayer"/ etc etc

Click: File

"Save Movie File"

My Computer

Next

Give it a File Name (Save in Video Folder)

Other Settings

Click Video for Broadband( 512 kbps)

Next

Saves Movie

Click Play Movies Box(Optional!)

Finish! ;)

393507 thumbnail
Posted: 15 years ago
#4
You can download this very easily and for free by clicking here: , then clicking on the blue "download now" button.

Once you've downloaded Windows Movie Maker to your computer, just follow the instructions for installation and you'll be ready to start making your Movies!

Section I: The Main Screen

This is the layout from WMM. The author put letter for explanation

Photobucket

A) Capture Video
This section of the program allows you to get everything you want so you can edit, including pictures, music, and of course video.

-Capture from video device- This is the first button you click if you're recording from a capture card or other capturing device you may have. That process will be explained later.

-Import video- This is used for browsing through your computer for video files that you would like to use to edit. By default, you start in your "My Videos" folder.

-Import pictures- This is used for browsing for pictures that you like to insert into your movie. By default, you start in your "My Pictures" folder.

-Import audio or music- This is used for browsing for audio files in your computer - whether they be songs or otherwise that you would like to use. By default, you start in your "My Music" folder.

B) Edit Movie
This section allows you to add titles, effects, and transitions to your movie and individual clips. I won't go effects and transitions, but later I'll show you how to do titles.

C) Finish Movie
In this area, you can render your movie with ease. That'll be covered later.

D) Collections
Here is your main area. It's kind of like a databank, where all of your imported files appear. This is also where your captured video appears when you finish capturing. Often times, video files that are in this area automatically cut themselves up into clips. I'll explain how to solve this later on.

Audio and picture files, however, stay intact, and can be easily moved into place.

E) The Video Screen
This screen is where you get a preview of your edited video so far. Down in the lower left are the basic Play, Pause, Stop, and Frame Forward/Backward buttons. The Frame buttons allow you to advance or back a single frame in the video.

F) Split Button
This tool is a very valuable asset to the experienced editor. As you edit videos, you will notice a blue bar over where you are paused or where in the video you are playing. It will pass over your video, audio, and titles. When paused, if you click the Split Button, whatever is selected be that a video, audio, or title, only one can be selected at a time that clip will split into two parts. This is especially useful for trimming the beginning and ends of clips in which often nothing is happening (right before or when you say "action" if you're filming actors).

G) Screenshot Button
This button takes a screenshot of whatever is on the screen at the time you click the button. You can save it to your computer, and then the screenshot will also show up in your Collections for using in the film if you wish. Here's an example of a screenshot:
Photobucket
The famed gangster Elite seen here rapping.

H) Video Track
Here is where your video is inserted into the timeline. Once it has been inserted by right clicking or dragging, you can manipulate it in several ways that will be explained later on. A video clip can be in the Video Track or in Collections and be cut with the Split Button.

I) Audio Track
This is where your audio and music clips are inserted into your movie. Once here, you can right click on them to adjust their volume settings. They can also be split with the Split Button.

J) Title Track
Here, all of the titles you create are added. Later on, you'll see how to edit them in several ways.

Other important buttons include the normal Save, Open, and New File options. However, for editing purposes, some useful buttons can be found to the top left of the Timeline area. They include Audio Balance, Views, and Zoom.

-Audio Balance- You can usually do this manually, however this feature allows you to adjust the balance between the sound from the video, and the audio or music. It's best to leave the video volume at normal level, so instead you can just right click on an audio clip to adjust its volume.

-Views- The Timeline view is the only view for which this tutorial is intended and the only view for which WMM is excellent in editing. The Storyline view is the other option.

-Zoom- Use this option for fine tune editing, such as titles and audio. Sometimes, when you want to Split at a certain frame, you have to use zoom to get smaller frames.

Section II: Capturing Video

I'm assuming most of the people who are going to see this are video game moviemakers. Throughout Section II, capturing will be explained by picture references. By clicking 'Capture from video device', you will get the following box. Below the picture are references to the key parts of the first step.

Photobucket

A) As you can see, I have a Dazzle 90 capture card. In this area, all of the available capturing devices are displayed. Make sure you choose your capture card or desired video device. Other devices may include a camcorder or a webcam if they are connected to your computer.

B) For maximum audio quality and volume, always have the Input Level setting to its highest level. Always make sure you test your audio input device; you can see if it's working by looking at the meter next to the slide button. You can test it before filming by simply turning on your Xbox or blowing into a microphone; whatever you're capturing.

C) The audio device is where your audio will be captured from. For me, it's my capture card. Others might include your computer microphone.

D) If you select your audio device, it should automatically choose an audio input source. To make sure the source is the right one, look at the audio input meter on the left, and see if its level corresponds with the volume of whatever you're capturing, such as what your Xbox is showing on the TV.

E) Video input source decides what cables it's getting video from. If you have an S-video cable set up to where you're capturing from, you want S-video to be selected. Composite is the default video input source.

Once you are done, click Next, and you will be taken to this second screen.

Photobucket

F) By default, the file name for the video you are about to capture is untitled. However, if you have a project open, the file name may name itself after the project title. It may also automatically name itself after the folder that you save it in.

G) This is where you choose a location (folder) to save your captured video file. You can choose almost any folder that is on your computer, but by default it saves to your 'My Videos' folder.

H) By browsing, you can find any folder on your computer to store your captured video file, or create a new one if it's a new project.

After you've determined what your video file name will be and where it will be saved, click next to go the following third step.

Photobucket

I) At the highest setting for playback, one minute of video is a total of 14MB, or 14 megabytes. That's a lot! Don't worry, I'll tell you later had to compress your video. This setting is the default, and I would also recommend it unless you don't think your computer is fit enough to handle large video sizes.

J) In the Other Settings drop down list, there are numerous options for file sizes and what they are fit for. Take a look and change your video settings only if you're sure you know what you need.

K) This area tells you how your video settings are affecting your video. Because I'm at a high setting, each second of video will be 2.1MB, and the video will be recorded in the standard WMV format, which is recommended. It also gives me the best viewing size and FPS..

L) This is a short summary telling you how big each minute of video will be, and how much space you have on your computer. If your harddrive has less than 20GB, you might want to record at a lower setting.

Finally, the last step can be found below. It is advisable to only get to this step when you are ready, as keeping this step open for a long time could cause the program to freeze.

Photobucket

M) These two buttons are the Start and Stop Capture buttons. Once you are ready, you click the Start Capture button to begin recording video to your computer. Once you are done, click Stop Capture, and it will stop recording.

N) This tells you how long you have captured, and how big the video file will be if you decide to finish. It is recommended that you only record one clip of video at a time, or around 14MB.

O) These are options not normally used, but are there if you want to use them. Create clips when wizard finishes means the program will cut your video file into separate clips when you are done filming. This usually gets a little hectic when you try to edit. Muting your speakers is simply for if you are recording from a computer microphone or other computer device, because your speakers may produce sound while you're recording and may be uninvitely recorded. Capture time limit will cause your recording to stop at a preset time if you select it.

P) This is a small video screen where you will see a preview if you are recording video.

Q) The Finish button is for when you are done filming a movie file. Once again, this is recommended after you have one minute of filming in a video file. Click finish, and you will be able to immediately edit that clip if you wish.

Section III: Basic Editing

Throughout this section, I'll take you through the editing process. I'll explain the basic process, and hopefully you'll be able to expand your abilities as you edit
more.

Selecting and Dragging

To get your movie going, you need media within your timeline. The best method of doing this is selecting and dragging. To do this, select a media piece in the Collections area that you want to add to the Timeline. While holding down the mouse button, move the mouse cursor to the spot on the Timeline that you want that clip to be placed, and release the mouse.

On the video track, everything automatically shifts to the left. On the audio and title tracks, however, you can move around clips. To do this, select the media and drag it left or right along the track, and release when you have it where you want it. Below is a beginner's course on editing.

Let's say we just filmed this clip that is sitting in Collections:

Photobucket

Adding to the Timeline

Now, I'm going to pretend this is the beginning of a movie. To edit it nicely, I should first have the clip in the timeline. You can simply right click and add it, or you can drag the clip into the timeline. Now I have this:

Photobucket

Splitting

I want the action to be going as the movie starts, instead of the scene standing still. This happened because I started recording a little bit before the action started. I've placed the Seek Bar (Blue bar) where I want to start the film, and by using the Split Button, I can now cut the whole clip into two. There is a little clip in the beginning that I don't want, and now the rest of the big clip. I've zoomed in to more accurately edit and use the Split Button:

Photobucket

Now, I'm simply going to right click on the small clip to delete it. Now, I'm going to let the movie play to where I want it to stop. There, I will simply use the Split Button again to separate the two pieces of film.

Photobucket

Fading

To make the beginning of the film look nice, I will right click on the first clip and click Fade In. This will cause a black fading transition at the beginning of the clip. If I wanted to, the Fade Out transition can also be used for a black fade transition at the end of the clip. Fading is good to use between scenes. If you use Fade Out on a clip that is not the last in the movie, make sure the next clip has Fade In. Note the blue star on the clip:

Photobucket

Getting Rid of Unwanted Clips/Footage

Okay, so I've got the first clip done. Now I can move on to the second. I cut the large clip because my character died, so I want to stop just before that to get maximum footage. I've cut where I wanted to, so now I'm going to play the movie, then pause and use the Split Button where I want to start again. Imagine it like a piece of tape. It's like cutting off pieces and throwing them away. There is now a useless piece in the middle, and I can use the Delete feature to get rid of it:

Photobucket

Melting

There's a neat effect that looks good in almost any movie, and it's known as melting clips. Pretend two clips are right next to each other. If the two clips are melted, clip 2 starts before clip 1 ends. In the video track, they look like they are overlapping. At the end of clip 1, it starts to fade out at the same time that clip 2 fades in, causing the viewer to see both clips at once for a short time.

To do this, simply grab the second clip that is going to be used in the melting effect. Then, drag the cursor with the second clip over the first clip, (the clip before it). An angled blue line will appear. The farther you drag, the longer the effect will occur, and the narrower the line will appear. The best melting effect is second to 1 second.

The vertical red line is even with where the first clip ends. If you look at the tip of the blue line, you'll see where the second clip starts. The horizontal red line indicates a length of about 1 second for the transition/effect to take place. This is what it looks like when you're dragging it:

Photobucket

Finished Video Editing

Now, I'll edit the rest of the video using splitting, deleting, fading, and melting. Make sure you save often! This is the result (zoomed out now so the whole movie is seen:

Photobucket

Okay, the video editing is complete! In the future, you'll unlock the secrets of Window Movie Maker's more interesting effects and editing methods. You just have to explore and try out new things for yourself, and you'll get the hang of it. To add any of some dazzling and great video effects, right click on a clip and select 'Video Effects'. Effects go from slow motion, to film aging, to black and white!

For more transitions, click 'View video transitions' on the left side of the program to choose from several dozen different and awesome transitions.

However, just the video doesn't make a good movie. Adding titles and audio is essential!

Adding effects with Windows Movie Maker

Once you have your clips in the sequence you want, you can start adding effects and transitions. In order to do this, you must be in "storyboard" mode. To make sure you're in this mode, look near the bottom left of your screen and you'll see this:

Photo Sharing and Video Hosting at Photobucket

1) In the "Movie Tasks" column on the left hand side of your screen, under Edit Movie, click on the blue "View video effects" link.
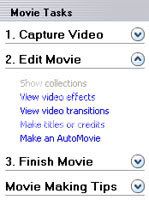
Photo Sharing and Video Hosting at Photobucket

2) This will now show a wide choice of effects in the middle pane. Some examples of effects are Blur, Brighten, Darken, Fade In, Fade Out, different types of zooms and even a Hue effect.
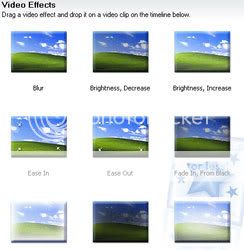
Photo Sharing and Video Hosting at Photobucket

Tip: You can preview any effect you'd like by clicking on the effect and then pressing the "play" button on the preview player.

3) Click on the effect you'd like and "drag and drop" your selected effect onto the clip you want it to appear on. Your video clip will now have the effect added to it.

– Repeat the steps above for each video clip you'd like to apply an effect to.

Adding transitions with Windows Movie Maker
1) In the "Movie Tasks" column on the left hand side of your screen, under Edit Movie, click on the blue "View video transitions" link.

Photo Sharing and Video Hosting at Photobucket

2) This will now show a wide choice of transitions in the middle pane. Some examples of transitions include bars, a heart, circles, checkerboard, dissolve, fade, flip (my personal favorite), mirror, grayscale, sepia, slow down (half speed), or speed up (double speed - fun for driving videos)
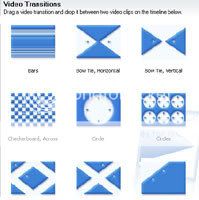
Photo Sharing and Video Hosting at Photobucket

Tip: You can preview any transition you'd like by clicking on the transition and then clicking the "play" button on the preview player.

3) Click on the transition you'd like and "drag and drop" it between the two clips you'd like to transition. You now have successfully added a transition between two clips.

– Repeat the steps above for each transition you'd like to apply between video clips.

393507 thumbnail
Posted: 15 years ago
#5

l Sony Vegas Tutorials l Updated*

This is a nice tutorial that I came across recently, it explains the basics of Sony Vegas very well. Once you get hold of the basic features, the usage of the more complex ones comes to you easily 😊
*You need flash player to play the first 11:
[These are videos]


*Please note that all the tutorials are with respect to Sony Vegas 7.

If there are other problems that you encounter while using Sony Vegas (Any version), feel free to PM me. I'll try my best to help you out 😃
393507 thumbnail
Posted: 15 years ago
#6

Get started with Windows Movie Maker

Ready to start making movies with your computer? Find out the basics of what you need to have and know.

The basics

Videos: See what you can do with Windows Movie Maker

Watch how others created, edited, and shared their home movies—and learn how you can do it yourself.

What you need to make movies with Windows XP and Movie MakerWhat you need to make movies with Windows XP and Movie Maker

Before you get started, you need the right equipment. See what you need to create your movie masterpieces.

Connect your camera to your computer

The first step to creating a movie is connecting your camera to your computer. Here's how to do it.


Now that your camera's connected to your PC, find out how to download your movies so you can start transforming them.

Next stop: Hollywood!

Once you've downloaded your video, see Create great movies to learn how to turn your video into a masterpiece.

Make your first movie

Video: See how to make your first movie

Watch the video, and then follow the steps to do it yourself. There are even handy instructions that you can print.

Let Windows Movie Maker create a movie for you

Don't have time to edit every scene? AutoMovie in Movie Maker will analyze your video and automatically make a movie for you.

Create and trim video clips

Change the clips that are automatically created when you import video to your computer.

Work with your collections

You've shot hours of footage and maybe even edited a few movies. Now learn how to organize your collections and clips.


393507 thumbnail
Posted: 15 years ago
#7

Creating and sharing great movies

You have the inspiration. Now you just need the know-how to bring your visions to life. See how easy it can be to create, edit, and add special effects to your movies using Windows Movie Maker.

Add professional touches

Video: Use special features to polish your video

See how you can use titles, effects, and transitions to make your movie look the way you want.

Add transitions and special effects

Make your movies more polished with special effects and professional-looking transitions between scenes.

Add titles and credits

What's your movie called, and who helped you create it? Add titles, credits, and text to your movies to let the world know.

Add music

Set the mood for your movie by giving it a soundtrack. It's easy to add songs, mood music, and any other audio.

Add narration

Use your own words and voice to describe the scenes in your movie. Voice-over is effective and simple to add.


Save and share your movies

Video: See how to save your movie in different formats

Set the mood for your movie by giving it a soundtrack. It's easy to add songs, mood music, and any other audio.

Save your movie

Learn how to save your movies for yourself, your family, and your friends, in formats that everyone can access. Save your movie:

* To your computer
* To a CD
* To a DVD
* For the Web
* For e-mail


393507 thumbnail
Posted: 15 years ago
#8
http://www.youtube.com/watch?v=JZXK68NS7gU&feature=player_embedded

see this hw 2 make vm will help u a lot
393507 thumbnail
Posted: 15 years ago
#9


Saving a movie

Q.When I save a movie from Movie Maker to a tape in a digital video camera, why are there small patches of blue in my video?
A.

This happens when your computer cannot send the movie to your camera fast enough. When the camera is waiting for more video from your computer, it adds the blue frames.

To fix this issue

'

Close any other programs that are running before you save your movie to digital video tape. Programs that need to access the hard disk drive could slow down your computer when you're saving your movie.

'

Defragment your hard disk. When you save your movie to a digital video tape, Movie Maker creates a temporary DV-AVI file that eventually gets sent back to your camera. This file can be large'approximately 13 gigabytes (GB) per one hour of video'and Movie Maker will try to use the largest unfragmented space available in your temporary location.

'

Make sure you're using a fast, internal hard disk that has a speed of 7200 RPM or higher. Currently, many laptops have a hard disk drive speed of 4200 RPM, which can cause problems.

'

Make sure the temporary storage location is located on an NTFS partition (uncompressed) rather than FAT32. The Microsoft Support Knowledge Base offers information about how to convert the partition from FAT32 to NTFS.

Q.When I save a movie to tape in my digital video camera, why are the first few seconds of my video missing?
A.

This problem occurs if a digital video camera does not start quickly enough when saving a movie to digital video tape in Movie Maker. In this situation, Movie Maker begins sending the video to the camera before the camera is ready to begin recording to the tape. As a result, the first few seconds of the movie are not recorded to the video tape. You can work around this issue by adding a title page to the beginning of your movie that appears for several seconds.

If you don't want to display a title, simply leave it blank. If you already have a title page, extend it to display for several additional seconds. The first few seconds of the video may still be lost, but no one will really notice.

Q.Why does Movie Maker stop responding, or "hang," when I'm saving a movie?
A.

This is caused by a combination of having a complex storyboard/timeline (which may include many images, video effects, video transitions, and video) and an insufficient amount of memory. Work around this issue by removing some effects or transitions, or by saving your movie in different pieces.

Q.What can I do if Movie Maker stops responding at about 58 percent when I try to save a movie to a CD using Movie Maker?
A.

When you select the Recordable CD saving option in the Save Movie Wizard, select a movie setting other than the Best fit for recordable CD (recommended) setting. On the Movie Setting page, click Show more choices. On the Other settings list, choose the second item on the list: Video for local playback (1.5 Mbps). If you continue having problems, choose the third item on the list, Video for LAN (1.0 Mbps). Then click Next, and continue with the standard instructions.

Q.Why do I keep getting an error message that says a recordable CD drive was not detected when saving a movie to a CD using Movie Maker?
A.

This can be a result of having third-party CD-writing software installed that does not work properly with the CD-writing functionality of Windows XP, or of having a recordable CD that has already been written.

To resolve this issue, try one of the following

'

If you have an HP DVD+R/+RW DVD writer installed on your computer, the HP Direct Letter Access (DLA) driver might be installed on your computer. You can turn off DLA, which should let you successfully save your movie to a recordable CD.

'

Verify that the CD was not already written to using a third-party CD-writing program such as Nero. Movie Maker expects a CD to have a Joliet (mode 2) disc format. However, some CD-writing programs write discs using a different format. To solve the problem, insert a new, blank recordable CD. In the future, choose Joliet (mode 2) when originally writing to the CD using third-party CD-writing programs.

Q.I can't send a movie as an attachment in an e-mail message. Why is this?
A.

If you cannot successfully save and send a movie in e-mail by using Send in e-mail in Movie Maker, try one of the following:

'

If your default e-mail program is not installed correctly or does not support Message Application Programming Interface (MAPI), set Outlook Express as the default e-mail program.

'

If an error message indicates that the video file is too large to send in e-mail, reduce the size of your movie by reducing the amount of video or audio on the storyboard/timeline. Or you can increase the file-size limit for sending a movie in e-mail as an attachment.

Q.What can I do if I'm having problems uploading my movie to a video-hosting provider through Movie Maker?
A.

First, verify that you have a working Internet connection. This connection is required to upload your movie to a video-hosting provider's Web site. The connection ensures that a current listing of video-hosting providers for your country or region is automatically downloaded to your computer. If you cannot successfully send a movie to a video-hosting provider's Web site, try the following:

'

Make sure the user name and password are entered correctly.

'

Verify that you have enough available disk space for your account on the video-hosting provider's site.

'

Verify that a movie with the same file name does not already appear on your account on the video-hosting provider's site.

'

Reduce the video quality setting. Some video-hosting providers place a limit on the maximum bit rate for a movie file that you can upload to their site.

Q.What can I do if the video in my movie plays unevenly?
A.

If you saved your movie using one of the DV-AVI movie settings, the movie may play back unevenly on a slower computer. Save the movie using Windows Media Video format (WMV) instead. If you saved a movie as a WMV file and the video plays back unevenly, try the following:

'

Reduce the amount of transitions or effects on the storyboard/timeline in Movie Maker, and then try saving the movie again. Many transitions and effects can result in dropped frames in the saved movie, which degrades the quality of the movie.

'

Save the movie using a movie setting that has a smaller display size. For example, rather than saving the movie in the Save Movie Wizard with a movie setting that displays video at 640 x 480 pixels, choose a movie setting that displays video at 320 x 240 pixels.

'

Choose a movie setting that uses variable bit rate (VBR), which can increase the smoothness in the video. On the Movie Setting page, click Show more choices. On the Other settings list, choose High quality video (large). If you continue having problems, choose the next item on the list, High quality video (small). Then click Next, and continue with the standard instructions.

Q.What can I do if I saved a movie in Movie Maker that includes an imported Microsoft Photo Story, and the resulting movie appears black?
A.

This may occur if the Photo Story you imported into Movie Maker was saved at a higher display setting, such as 1024 x 768 pixels.

To work around this issue

1.

In Photo Story, save your story with a setting that has a smaller display size, such as 640 x 480 pixels.

2.

Import the resulting Photo Story into Movie Maker.

3.

Add the Photo Story to the storyboard/timeline in Movie Maker, edit it (if necessary), and then try saving the movie again.

Q.What can I do if my saved movie contains solid black frames for a portion of the video?
A.

To work around this issue, try one or more of the following

'

Verify that you have the latest version of Microsoft DirectX End-User Runtime installed on your computer. You can download Microsoft DirectX End-User Runtime from the Microsoft Download Center.

'

Remove some of the video transitions or effects from the storyboard/timeline, and then try saving the movie again.

'

Keep the transitions and effects on the storyboard/timeline, but save the movie in pieces as several smaller DV-AVI files. You can then import the saved AVI files into Movie Maker, add them to the storyboard/timeline, and save it as one movie file.

Q.How can I improve the quality of a movie that I want to send as an attachment in an e-mail message?
A.

You can improve the quality of your saved movie when you choose Send in e-mail by increasing the maximum e-mail attachment file-size limit in Movie Maker. For detailed instructions on how to increase the maximum attachment size, read Save your movie for e-mail.

Q.Can I save my movie by using a movie setting that is not listed in the Save Movie Wizard?
A.

Yes, you can create your own movie settings and use them to save your movie in Movie Maker. To create your own movie settings, you can use the Windows Media Profile Editor, which is installed with Windows Media Encoder 9 Series.

iqra11 thumbnail
Anniversary 16 Thumbnail Group Promotion 4 Thumbnail Networker 2 Thumbnail
Posted: 15 years ago
#10
THANKS RUMI well expalined
and thanks again
Top